It is English version of the following article in Japanese.
Unityで動画編集ができるアセットCinema Director の概要とTips紹介 - CrossRoad
On Unity Asset Store, there are several video editing assets. But I could not understand "What is it mean that video editing on Unity?", because I think Unity is a game development tool. That's why I bought an asset "Cinema Director" and tried it.
In this post, I'll introduce about "Cinema Director" and how to use it.
- 0. What is relationship between Cinema Suite and Cinema Director?
- 1. Overview of Cinema Director
- 2. Basic Operation
- 3. Main functions
- 4. How do I make movie?
- 5. Tips
- 6. Impressions
0. What is relationship between Cinema Suite and Cinema Director?
When you search for "Cinema Director", you can also find "Cinema Suite". Cinema Suite is a package asset. It includes four asset related with cinema. In this blog, main target is "Cinema Director".1. Overview of Cinema Director
Cinema Director is an asset which controls unity objects on timeline like the following capture.
Horizontal axis is time. Each horizontal items are game objects. You can call components of each game objects on timeline. You can arrange each game objects, execute scene, then each game objects move according to the arrangement. Basically, it takes a lot of time to control timing by only script. The timeline control function is so convenient.
2. Basic Operation
At first, you need to buy the asset from Unity Asset Store. After importing the asset to your Unity project, you can use function of "Cinema Director" from Window menu.

(The capture shows other Cinema Suite family because I tried on Cinema Suite. )
2-1. Making CutScene
In Cinema Director, timeline editor is called as "Cut Scene". At first, you need to create "Cut Scene". You choose "Create CutScene" as reference to the following capture. Then, you can see editor like following capture.
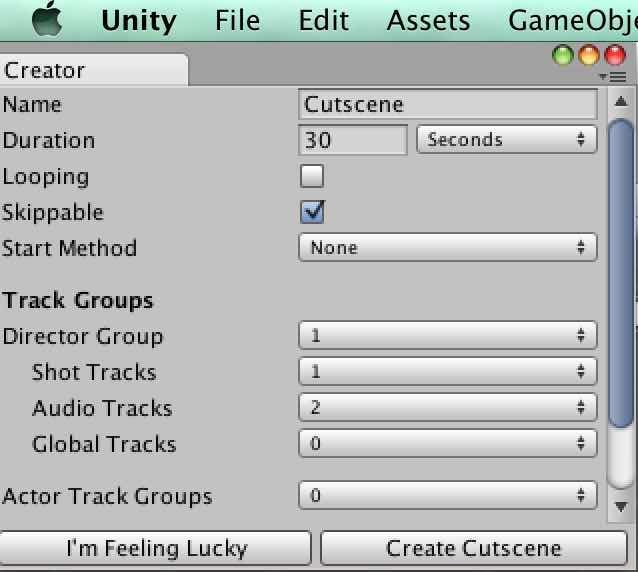
Name :
It is the name of "CutScene" object. It is showed on Hierarchy View. Any name is OK. If you don't change the name, a GameObject named as "CutScene" is displayed on Hierarchy View.
Duration:
It is setting time for movie. If you set it as 60 seconds, you can make 60 seconds movie. Default settings is 30 seconds.Looping:
It is loop setting option. If you set it as active, cut scene is looping.Skippable:
If you would like your cutscene to end on either a gamepad movement or by a keyboard command, select the this option as well.Start Method:
In this option, There are three options: "On Start", "On Trigger", and "None". If you select "On Start" option, timeline control by "Cinema Director" begins when Unity scene starts. If you have no special reasons, "On Start" options is recommended.Track Groups:
You don't have to set anything in this sections. You can set it later. It is explained in Section 2-2.If you click "I'm Feeling Lucky", "Cinema Director" set game objects in Hierarchy View on timeline editor.
2-2. Set game object on Timeline
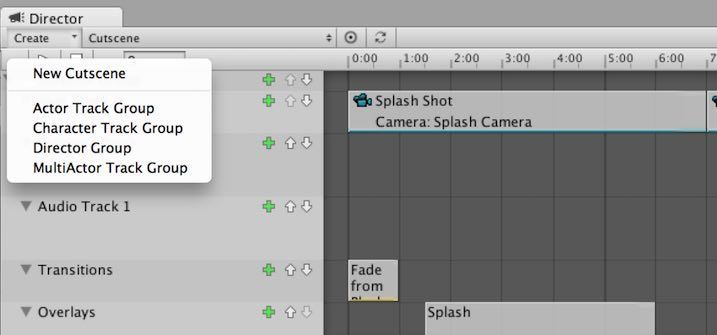
When you open time line editor, click "Create", then you can see menu like this.
It includes four options :
- Actor Track Group
- Character Track Group
- Director Group
- Multi Actor Track Group
Actor Track Group:
It is a group for a game object. You can also select light and uGUI game objects. You can make game objects visible or invisible at any timing. You can also set "SendMessage" function at any timing.Character Track Group:
It is a group for 3D model controlled by Mecanim.Director Group:
It is a group for functions which affect on Unity scene.Example:
- Playback or stop BGM
- Change Camera angle
- Change Unity Scene
Multi Actor Track Group:
It is a group for game objects. It looks like the same as "Actor Track Group", but the group can control multi game objects. On sample scene, the group was used for blinking robot eyes. See section 3-2. There is a short animation movie.Let me explain each options.
Case 1 : Actor Track Group, Multi Actor Track Group
When you click "+" button on timeline, menu is displayed.
It includes two options :
- Add Actor Track
- Add Curve Track

Add Actor Track:
You can control a game object. An example is following.
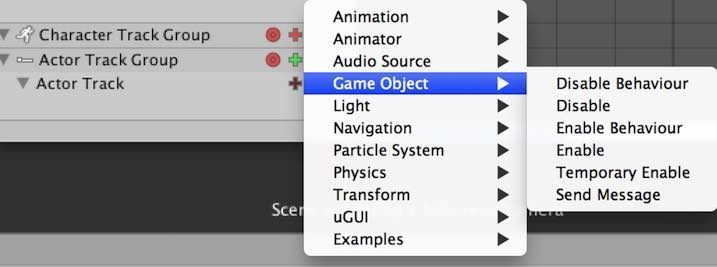
You can imagine how functions do by function name. For example, "Enable" and "Disable" functions are that make a game object visible or invisible.

Enable

Disable
Add Curve Track:
It can attach xyz direction moving to a selected a game object. It is similar to Unity animation. On the example, the track is adapted for a camera.
Case 2: Director Group
When you click "+" button on timeline, menu is displayed.
It includes three options :
- Add Audio Track
- Add Global Track
- Add Shot Track

Add Audio Track:
You can control scene audio. When you use the function, a new game object is generated with Audio Source component and Audio Clip in Hierarchy View.
Add Global Track:
You can control functions which affects whole scene. Followings are example.
For example, "Set Time Scale" of the list can change processing speed on scene.
Add Shot Track:
You can set camera objects. For example, sample scene "Director Basics.unity" sets several camera objects.
[Caution]
All camera objects in the scene don't have any functions. Each names derive from each positions.
(Each specific names made me misunderstood...)
3. Main functions
I have made a movie by Cinema Director. But I couldn't publish it with several reasons. Therefore, I'll introduce main functions with the sample scene of the asset and my instant examples.3-1. Change camera work
For example, you can use expression like this if camera object is controlled in timeline.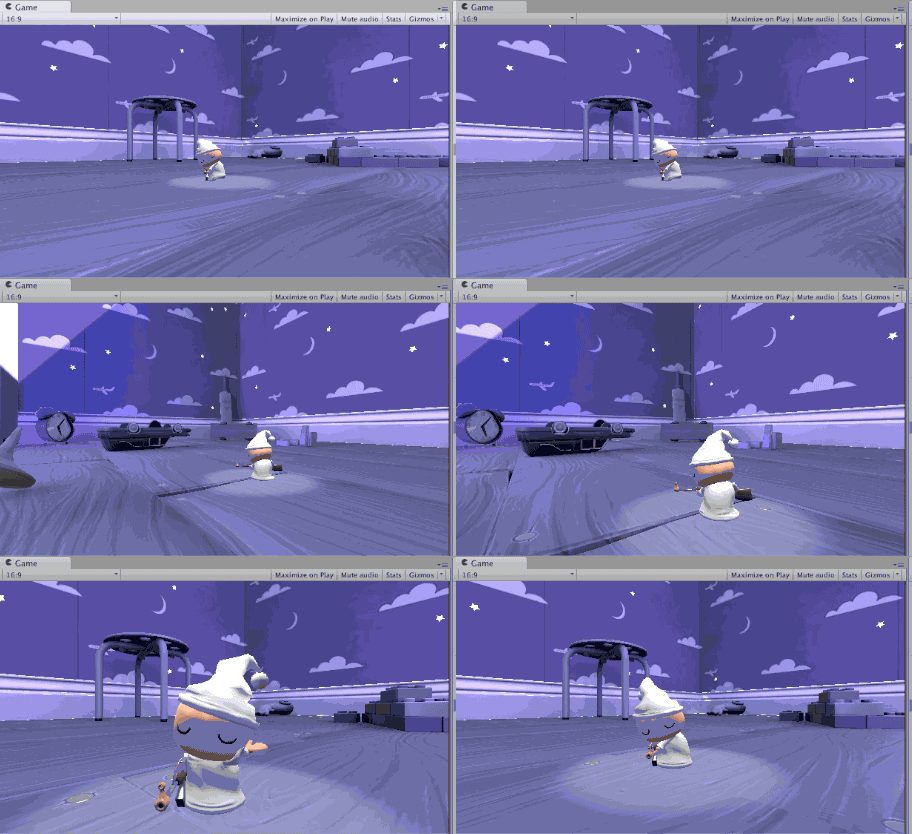
I developed the scene by timeline editor like this.
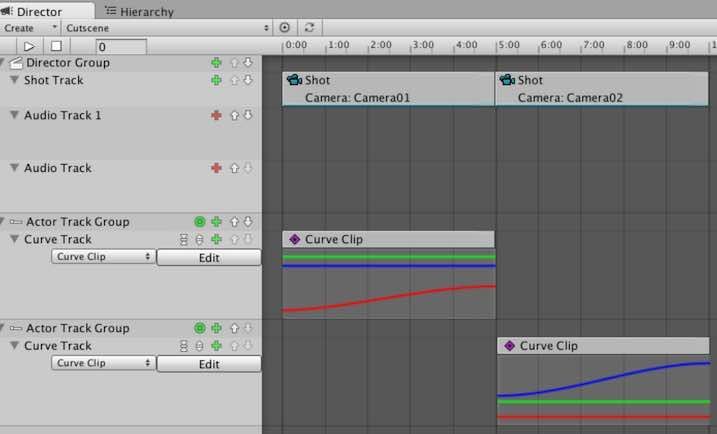
The scene has two camera objects. "Camera02" object is invisible. ("Disable" setting)
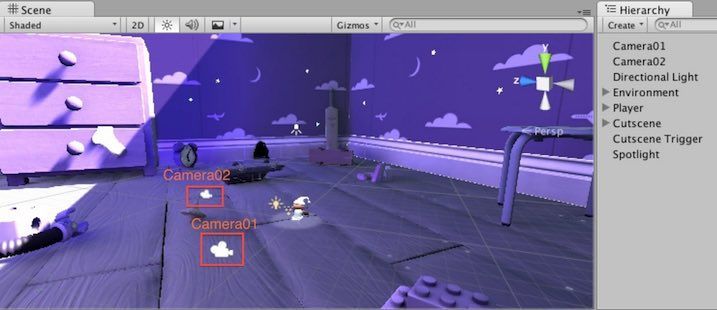
"Camera01" object displays the scene from 0 to 5 sec. "Camera02" object does from 5 to 10 sec. See "Curve Clip" in the screen capture. "Curve Clip" can change "Transform Position" as time passes. Then, you can control zoom in/out in Unity.
3-2. Animation
For example, you can develop such a scene if you also use "Animator Controller".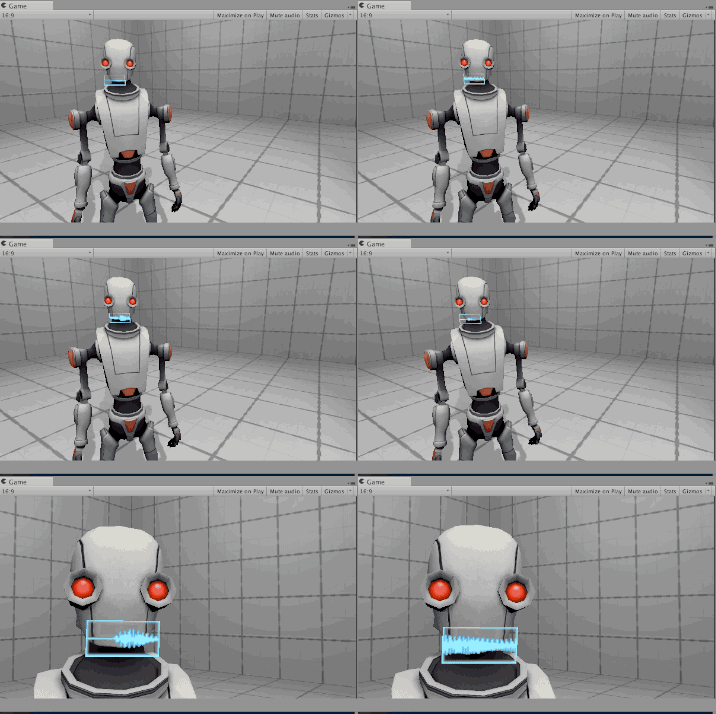
A robot blinks at odd intervals. Let's see timeline editor.

Triangle figures mean timing when blink motion of robot executes. (Screen capture of the timeline is part of the movie)
In Cinema Director, you can edit inspector view of Unity when you click the triangle figure at any times.(Not only animation, but also every functions)
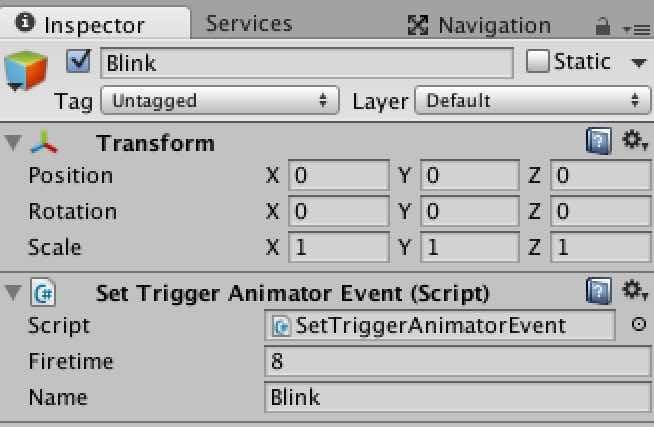
In this case, I edited "Blink" of the "Name". Where is "Blink"? It is a transition condition of blink animation controller.

3-3. Transition
When you click "Director Group / Add Global Track " and select each items, you can find "Transition".
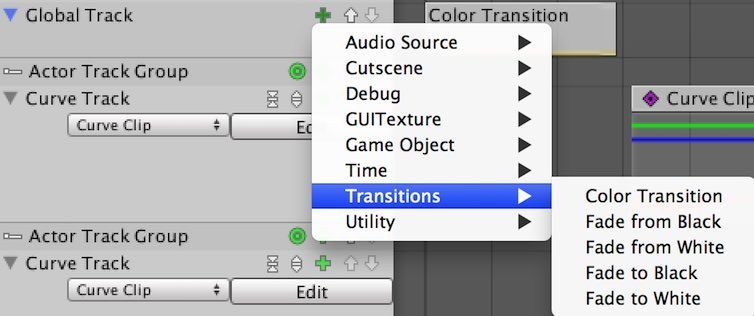
In this menu, you find several feature like "Fade from Black", "Fade to White". You can add transition effect if you select the feature. In my environment, however, every features seem to not be seamless. Therefore, I adjusted color transition setting and realized seamless transition.
Following is my setting example.
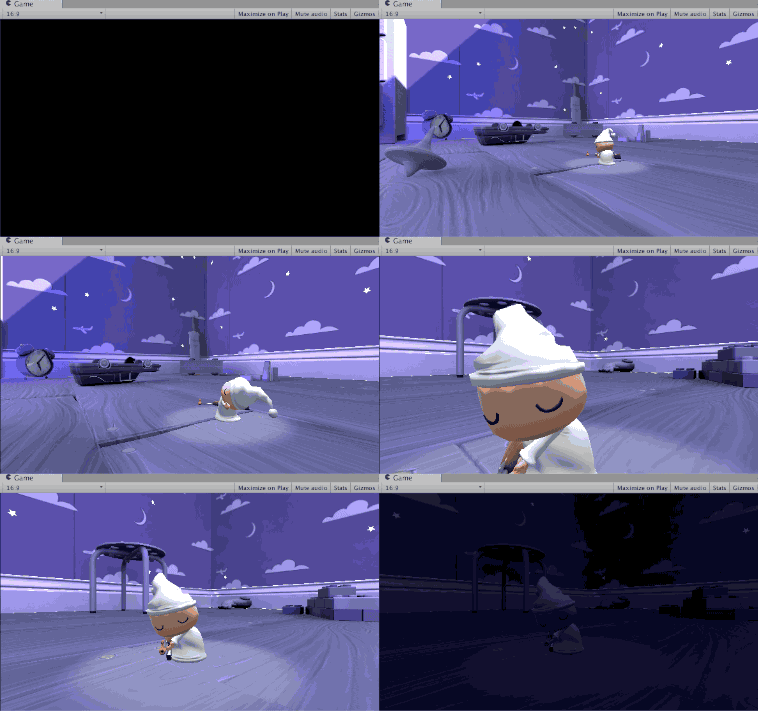
I edited timeline editor like this.
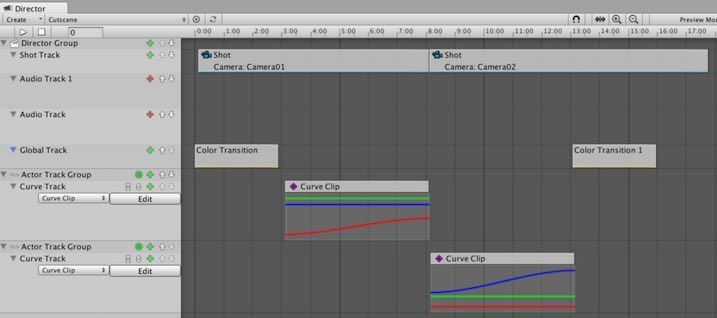
In this example, I modified the timeline of 3-1 section, expanded active time of "Camera01" and "Camera02", and added "Transition" at start/end point. You can set the setting very easily because you only have to modify alpha of "Color Transition". At first, you left-clicked "Color Transition" on timeline editor. Then you can modify setting in inspector view.
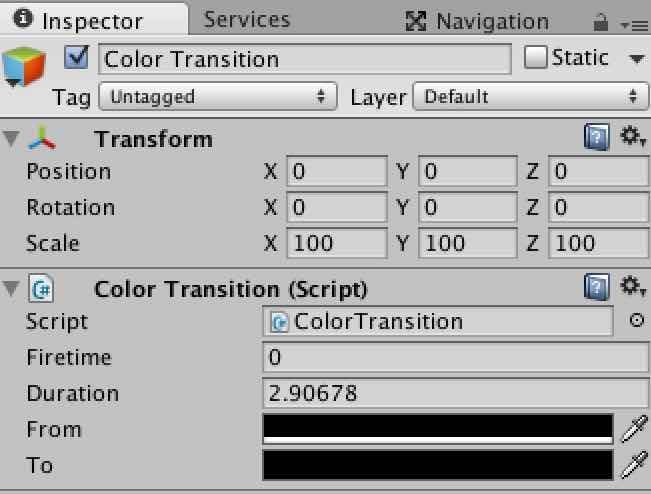
When you click "from" and "to" like the screen capture, color panel setting opens. Now, you set alpha number.
fade in
from : alpha = 255to : alpha = 0
fade out
from : alpha =0to : alpha =255
4. How do I make movie?
As I said at introduction section of this blog, Cinema Director can control game objects on timeline editor. You have to know that Cinema Director could not convert scene into movie format such as mp4. Therefore, you need to use several tools other than Cinema Director.
Here is my tips.
(1) Screen capture tool
In my case, I captured my unity scene by Quick Time Player (free version is OK). If you use Quick Time Player, mouse cursor is visible during recording. I recommend the following tool. It can just erase mouse cursor.
Cursorcerer for Mac - Free Download Version 3.1 | MacUpdate
(2) video editing tool
I recommend the following tool because it is easy to use.「Filmora Video Editor - 動画編集」をMac App Storeで
5. Tips
I listed up several tips based on my experience. Hope they are useful for you!
5-1. Only enabled(active) camera objects can be controlled by Shot Track /Set Camera option
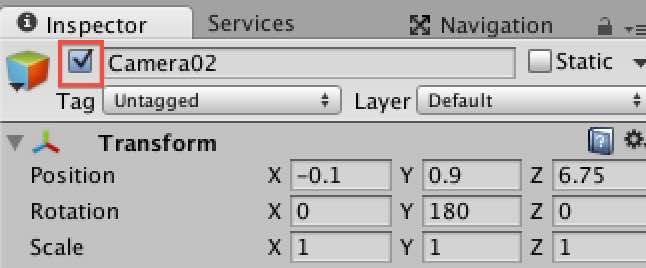
In my experience, after I added various angle camera objects, I disabled most of camera object because I would like to simplify game view. Then I could not set each disabled camera objects on Shot Track of timeline editor. You should make a camera object you want to control active.
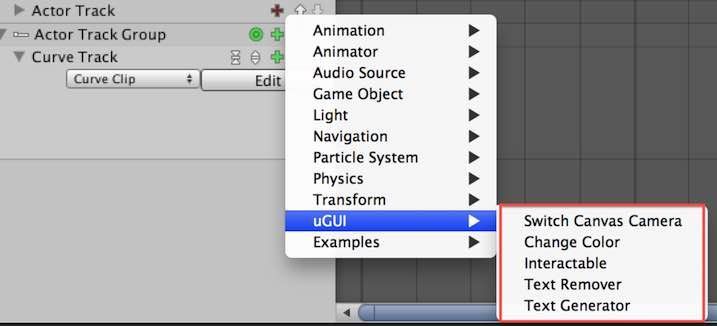
5-2. Cinema Director does not support image component of uGUI
It is a tips as of 28th Mar, 2016. Image component may be supported on future update. Basically, you can control text based component.
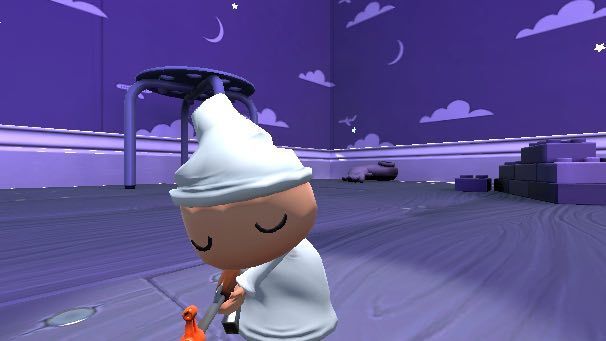
5-3. Storyboard function is screen capture
When you select Storyboard option of Global Track and put triangle figures on any position of timeline editor, you can save screen capture at the moment.
For example, I put a triangle figure at the position of red square. Then such a picture is saved in Assets top folder. It takes seconds to generate a picture file.
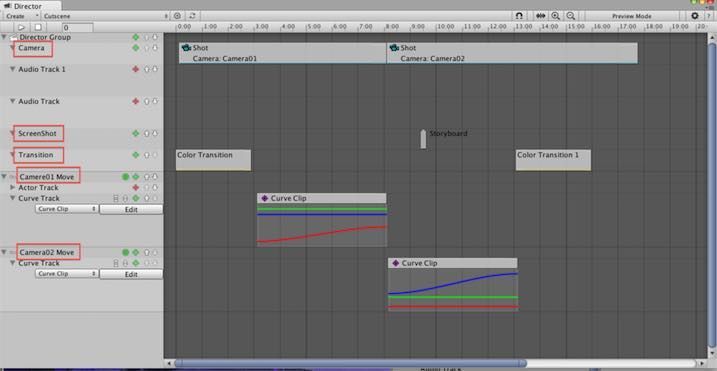
5-4. You can change track name on timeline editor
On this capture, I changed names of red squares.
6. Impressions
I think Cinema Director is a wonderful asset because we could easily control game object on timeline editor. It is easy to make movie scene on Unity. Cinema Director has various functions which are not introduced by my this blog. For example, if you use SendMessage option, you could control any your function on time line editor.On the other hands, some functions such as transition feature (See section 3-3) are difficult to use. When I made a movie, I edited most of animation in Cinema Director. But I edited character's voice, BGM, and added subtitle in Filmora.
Some functions are suitable for Cinema Director, other functions are suitable for video editing tool. Depending on situation, we should choice best method. Then we could save development time and wonderful works.
Enjoy!